 Skip to content

Tire Cover Cut and Sew Capabilities
- 5,000–8,000 cut sets/day across standard and bulk cutting routes.
- 3,000–3,500 finished pcs/day is the standard planning baseline for stable production.
- 20–40 samples/day support prototypes, fitment checks and revised constructions.
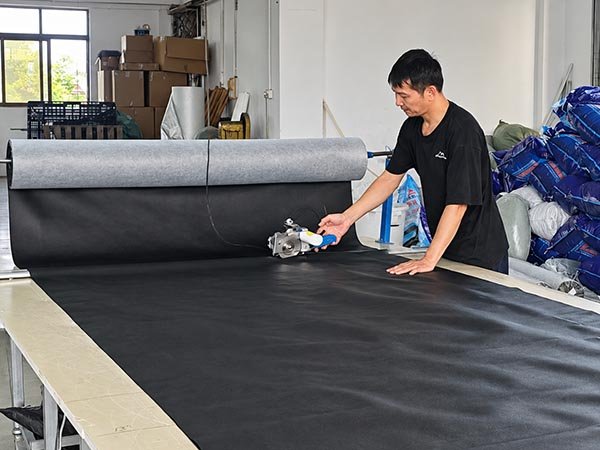
- Production routes include CNC cutting, multi-ply cutting, walking-foot sewing, cylinder-bed sewing, binding, bartack and pattern sewing.
Cut and Sew Quality Starts Before the Needle Moves
Pattern Drift
- Pattern ID and revision are checked before cutting.
- Seam allowance, notches and center references are defined before bulk.
- Vehicle-specific and camera configurations use controlled pattern versions.
- Revised constructions return to sample approval before release.
Cutting Shift
- Printed panels use registration-controlled cutting where required.
- Standard soft-cover panels are checked against released dimensions.
- Multi-ply cutting is controlled to prevent layer shift.
- Cut pieces are identified before they enter sewing.
Sewing Damage
- Sewing parameters are material-specific.
- Critical seams receive additional inspection.
- Curved seams are checked for puckering and alignment.
- Surface damage is treated as a production defect, not a cosmetic afterthought.
Assembly Failure
- Elastic and bungee systems are matched to the intended fit.
- Buckle and webbing attachments use controlled reinforcement.
- Camera structures follow a dedicated construction sequence.
- Critical pull-load components can enter pull-force verification.
Six Core Cut and Sew Manufacturing Capabilities
Pattern Control
- Pattern ID and revision control.
- Vehicle and tire-size linkage where relevant.
- Camera references and special openings.
- Golden sample connection for bulk release.
Precision Cutting
- CNC low-ply and multi-ply cutting.
- Registration-controlled cutting for printed parts.
- Material-specific stack height and cutting method.
- Cut-panel inspection before transfer.
Material Sewing
- Needle and thread matched to material.
- Stitch length adjusted by construction.
- Walking-foot or other feeding methods selected as needed.
- Heavy materials receive slower, more controlled handling.
Structural Sewing
- Circular and curved seams.
- Reinforcement at load points.
- Double-needle or bartack where specified.
- Pattern sewing for repeatable reinforcement shapes.
Edge Finishing
- Material-matched binding options.
- Controlled width and tension.
- Camera-hole and opening finishing.
- Premium appearance close-up inspection.
Component Assembly
The final construction may include elastic, bungee, drawstring, cord lock, buckle, hook-and-loop, zipper, webbing, patch or label. Szoneier integrates these components into the released sewing sequence and verifies that attachment points match the approved specification. Assembly is treated as part of product engineering because it directly affects retention, installation, wind resistance and brand presentation.
- Elastic and cord assembly.
- Buckle, strap and webbing reinforcement.
- Zipper and closure integration where required.
- Patch and private-label attachment.
Match Tire Cover Construction to the Manufacturing Route
The correct cut-and-sew route depends on the material, product structure, artwork, fit requirement and order volume. This matrix shows the main manufacturing focus for common tire-cover programs.
| Tire Cover Type | Typical Material | Cut & Sew Focus | Main Manufacturing Risk |
|---|---|---|---|
| Standard Spare Tire Cover | PVC / printable polyester | Circular front, sidewall, elastic back | Diameter drift, wrinkles, weak elastic |
| Premium Automotive Cover | Marine vinyl / PU | Surface protection, curved seam, binding | Surface marks, puckering, uneven edge |
| RV Single Wheel Cover | 420D / 600D | Side depth, repeat dimensions, closure | Inconsistent fit between sizes |
| RV 2-Pack / 4-Pack | 420D / 600D / 900D | Repeated panel cutting and assembly | Set inconsistency or mixed components |
| Camera-Compatible Cover | PVC / vinyl / PU | Jig-controlled opening and reinforcement | Camera misalignment or weak opening |
| Heavy-Duty Storage Cover | 600D / 900D | Strong seams, bungee/buckle assembly | Stress-point or retention failure |
| Printed Promotional Cover | PVC / polyester | Registration-controlled front cutting | Off-center graphic after assembly |
| Complex Custom Construction | Multi-material | Multiple panels, zipper, straps, pockets | Sequence errors and construction drift |
From Approved Pattern to Repeatable Tire Cover Production
Define the Product Before Releasing the Pattern
- Fitment basis: Actual tire size takes priority over a vehicle name alone. The pattern needs enough information to establish finished diameter, side coverage and back-opening tension. RV, trailer and multi-wheel products also require the correct wheel arrangement and spacing assumptions where they affect the product structure.
- Construction basis: The team defines whether the product uses an elastic back, bungee, buckle, drawstring, zipper, reinforcement, binding or another structural feature. These decisions affect seam placement, panel geometry, assembly sequence and material consumption.
- Artwork basis: For printed products, the approved graphic and its visual center must be considered before the production cut line is finalized. Camera-aware artwork needs a safe zone around the engineered opening. Pattern and artwork therefore cannot be managed as unrelated files.
- Release output: The controlled output is a pattern ID and revision linked to the product project. Once approved, this becomes the dimensional basis for sampling, cutting QC and bulk reproduction rather than allowing production operators to resize panels by eye.
Validate the Construction Through Sample and Fitment
- Prototype sample: Used to verify the basic construction, panel relationship and assembly sequence. A prototype may deliberately focus on shape and function before final branding is applied.
- Fitment sample: Used where the tire, vehicle or camera geometry is critical. The cover is evaluated on an actual tire, a 1:1 tire fixture, a vehicle fixture or an actual vehicle where available. A good result is snug enough to look controlled but not so tight that seam stress, material deformation or camera displacement occurs.
- Revised sample: Pattern changes are issued as revisions, not informal workshop notes. The affected dimension, seam, opening or reinforcement is updated and the new sample is checked against the revised requirement.
- Golden sample: The approved physical construction becomes the production reference together with the released pattern, material, artwork and QC standard. This creates a bridge between product development and the production cell.
Prepare Material and Cutting Files for Production
After approval, the material and cutting route are prepared around the released construction. The same shape may use a different cutting method depending on whether the order is a one-piece prototype, a short-run printed cover or a repeated 5,000-piece OEM program.
- Material preparation: Material identity, color, coating, thickness or fabric weight and lot references are confirmed before critical cutting. Heavy or coated materials require attention to lay flatness, surface protection and the number of layers that can be cut without distortion.
- Cutting route: CNC low-ply cutting supports flexible development and short runs. Multi-ply cutting improves efficiency for repeated panels when the material and stack height allow accurate cutting. Hot-knife or press cutting can be used where edge behavior, material type and repeated shapes make them appropriate.
- Registration control: Printed panels require more than dimension control. The production team must align the released cut path with the printed artwork so the visual center remains correct after the panel is sewn to the sidewall. Camera references and graphic-safe zones are preserved during this step.
- Piece identification: Cut panels are identified by size, pattern or project as needed before transfer to sewing. This reduces mixed-size and mixed-revision risk when several SKUs are being produced at the same time.
Sew, Assemble and Verify Against the Released Product
Sewing transforms flat panels into a three-dimensional cover, so dimensional control and workmanship must remain linked. Operators work from the released construction while inline inspection checks whether the process is drifting before a large quantity is completed.
- Sewing control: Stitch length, seam allowance, needle, thread, tension, backtack and curved-seam feeding are selected for the material and structure. Standard main seams often fall around 3-4 mm per stitch, while premium heavy-duty constructions may use approximately 3.5-5 mm depending on the material. The goal is not maximum stitch density; it is the correct balance between seam integrity and material damage.
- Finishing control: Binding, reinforcement and openings are checked for alignment, twist, skipped areas, uneven width and exposed edges. Camera products use their dedicated jig and pattern references rather than manual visual positioning.
- Assembly control: Elastic, bungee, buckles, webbing and other components are attached according to the approved specification. Critical load points receive additional inspection and can enter pull-force verification where the product standard requires it.
- Release control: Cutting QC, sewing QC, camera QC, inline QC and final QC compare production with the approved construction. The manufacturing objective is not to create something that looks close to the sample; it is to reproduce the approved product with controlled variation
Pattern Release Turns a Sample Into a Production Standard

Pattern Identity
- Pattern ID linked to the SKU or project.
- Tire size and vehicle reference where relevant.
- Product type and closure system recorded.
- Historical versions retained for comparison.

Revision Control
- R01, R02 or later revisions remain identifiable.
- Changed dimensions or features are documented.
- Revised samples are checked before bulk release.
- Obsolete revisions are not used for current production.

Seam and Assembly Marks
- Seam allowance defined by construction.
- Notches and centers support panel matching.
- Camera and artwork references stay coordinated.
- Reinforcement boundaries are controlled.

Golden Sample Link
The released pattern and the golden sample should describe the same product. The physical sample shows workmanship, tension, binding, appearance and fit that a digital pattern cannot show by itself, while the pattern preserves the geometry needed for repeat production. Szoneier uses both references together so reorders do not depend on memory or photos from the previous batch.
- Pattern explains geometry.
- Golden sample explains approved execution.
- QC standard defines acceptance.
- Repeat orders return to the same controlled references.
Cutting Methods Are Selected by Material, Artwork and Volume
CNC Low-Ply Cutting for Flexible Production
- Pattern precision: The digital cut path comes from the released pattern, reducing manual tracing and helping keep dimensions repeatable between sample and small-batch production.
- Material handling: PVC, PU, polyester and selected Oxford constructions can be cut in controlled low layers according to their stiffness and surface characteristics. Surface-sensitive materials are handled to avoid scratches, folds or drag.
- SKU flexibility: Low-ply cutting is practical when the order contains many sizes or frequent design changes. Production can switch between approved files without mixing paper patterns or relying on manual trimming.
- Best use: Samples, development, exact-fit projects, printed panels and flexible OEM programs where engineering control matters more than maximum stack efficiency.
Multi-Ply Cutting for Repeated OEM Panels
- Lay preparation: Material is spread and aligned before cutting. The allowable number of layers depends on thickness, coating, friction and how easily the stack can shift or compress.
- Cut accuracy: The process must hold the pattern through the stack. If the upper layer and lower layer differ materially, the apparent efficiency of a high stack creates fit variation later in sewing.
- Production efficiency: Repeated side panels, backs and standard front constructions can be prepared in larger batches, improving sewing-line continuity for 420D, 600D, 900D and other suitable materials.
- Best use: Mature OEM SKUs, RV sets, wholesale orders and repeated standard sizes where the pattern and material are already approved.
Hot-Knife and Press Cutting for Suitable Constructions
Not every panel needs the same cutting technology. Hot-knife cutting can help manage certain synthetic edges, while hydraulic or die-style cutting can be efficient for repeatable shapes when the product structure and material justify dedicated tooling.
Edge behavior: Some synthetics benefit from heat-controlled cutting because the edge can be cleaner and less prone to fraying, but the temperature and speed must not distort or damage coatings.
Repeat shapes: Press cutting is useful when a stable, repeated component makes a dedicated die commercially sensible. It is less flexible than CNC when frequent revision is expected.
Material compatibility: Thick vinyl, coated fabric, reinforcement pieces and accessory components may require different approaches. The cutting method is chosen around material response rather than equipment preference.
Best use: Repeated components, reinforcement pieces and compatible synthetic materials where speed and edge control can be improved without sacrificing dimension.
Cutting QC Protects the Sewing Process
Cutting is the first point where the released pattern becomes irreversible physical geometry. Szoneier therefore checks the cut result before it reaches sewing instead of asking sewing operators to compensate for dimensional errors.
Dimensional checks: Pattern ID, revision, diameter, width, sidewall and notches are compared with the released requirement. Standard soft-cover panels typically use a ±3 mm dimensional reference, while large RV panels may use ±5 mm; camera-critical features follow their dedicated project standard.
Registration checks: Printed panels are checked for visual and engineering registration so the artwork stays centered after seam allowance is consumed in sewing.
Defect checks: Surface damage, contaminated areas, poor edges and visibly distorted pieces are removed before value is added through sewing.
Traceability: Cut quantity and panel identity are controlled so multiple sizes or projects do not become mixed during transfer to the sewing cell.
Material Behavior Changes the Cut and Sew Method
The same pattern can behave differently when built in PVC, PU, marine vinyl or Oxford fabric. Szoneier adjusts cutting, feeding, needle and finishing decisions to the selected material.

Printable PVC
- Protect printed surfaces during lay and handling.
- Avoid unnecessary needle-hole concentration.
- Control graphic center during cutting.
- Verify folds and seams do not crack the surface.

PU and Synthetic Leather
- Check backing stability and directional stretch.
- Control presser-foot pressure and feed.
- Prevent face marking and puckering.
- Match binding or reinforcement to the surface.

Marine Vinyl
- Heavy-duty feeding supports stable multi-layer seams.
- Protect grain and surface from scratches.
- Use material-appropriate needle and thread.
- Inspect curved seams and binding closely.

420D Oxford
- Control layer alignment during bulk cutting.
- Avoid stretch or feed mismatch on long seams.
- Match elastic or bungee tension to the product.
- Verify finished size across repeated sets.

600D and 900D Oxford
- Reduce stack height when cut accuracy requires it.
- Match needle and thread to coating and thickness.
- Reinforce load points rather than simply increasing stitch density.
- Check seam bulk at joins and folded hems.

Printed Polyester Panels
- Use registration-controlled cutting where needed.
- Preserve printed center and bleed.
- Match panel tension around the circumference.
- Inspect final artwork position after assembly.
Printed Panels Must Stay Centered Through Cutting and Sewing
Control the Relationship Between Artwork and Pattern
- The design file and the pattern file describe different things. Artwork defines the visual content, while the pattern defines the material that remains after cutting and sewing. For a circular tire cover, the graphic center, cut center and visible finished center need to agree after seam allowance is consumed around the perimeter.
- Visual center: A logo may be mathematically centered but appear off-center because of text shape, a camera opening or an asymmetric illustration. Prepress and pattern teams review the composition before the cut path is finalized.
- Bleed and seam zone: Full-color graphics need enough bleed beyond the visible face so small cutting or sewing variation does not create an unprinted edge. Important text and logos stay inside a safe area.
- Camera-safe artwork: Camera-compatible covers require the opening to be incorporated into composition. The artwork should not place critical text or a face behind the engineered camera structure.
- Released files: The approved production artwork and released pattern revision are linked so an old pattern does not accidentally cut a newer design.
Register the Printed Panel Before Cutting
- Printed material may include registration features or known visual references that allow the cutting system to align the physical print with the digital pattern. Szoneier uses vision or registration-controlled cutting when the artwork position is critical.
- Panel recognition: The cutting setup identifies the intended outline and orientation before the material is cut. This is especially useful for photographic fronts, circular graphics and camera-position artwork.
- Center control: The operator checks the relationship between the printed image and pattern center. A small cutting shift can become highly visible after the sidewall is sewn around a circular graphic.
- Material distortion: Flexible materials can move, stretch or relax between printing and cutting. Lay control and practical registration checks prevent the process from assuming that every printed sheet remains perfectly dimensionally stable.
- Cutting release: The first printed cut panel is reviewed before a long run continues, particularly on new artwork or a new material-print combination.
Protect Registration During Sewing
- The front panel can still lose visual alignment even after accurate cutting if the sidewall is stretched unevenly during sewing. Circular sewing therefore needs balanced feeding and consistent notch matching.
- Notch alignment: Panel reference marks help distribute the circumference evenly. Without them, an operator can gradually pull one section tighter and rotate the graphic relative to the finished cover.
- Feed balance: Walking-foot or appropriate feeding helps manage differences between face and side materials. Excessive tension can distort the front panel or create wrinkles near the edge.
- Seam allowance: Consistent seam allowance protects the finished visible diameter. If the operator sews progressively farther inside the cut line, the face shrinks and the graphic can appear visually displaced.
- Finished check: Artwork position is verified on the finished product, not only on the cut panel, because assembly is the final stage that determines what the customer actually sees.
Sewing Equipment Is Chosen for the Construction
Walking Foot Sewing
- Multi-layer feeding.
- Curved sidewall attachment.
- PVC, vinyl and Oxford applications.
- Reduced layer creep during sewing.
Cylinder-Bed Sewing
- Curved and three-dimensional access.
- Back openings and difficult positions.
- Improved handling on smaller radii.
- Useful for selected binding and finishing operations.
Double-Needle Sewing
- Parallel visible seams.
- Premium aesthetic applications.
- Reinforced seam designs.
- Controlled spacing between stitch lines.
Bartack Reinforcement
- Strap and webbing ends.
- Buckle attachment points.
- Localized stress reinforcement.
- Repeatable reinforcement location.
Pattern Sewing
- Camera reinforcement shapes.
- Repeated patch attachment.
- Controlled local stitch geometry.
- Better consistency across bulk units.
Binding Equipment
- Raw-edge finishing.
- Camera and reinforced openings.
- Consistent tape width.
- Cleaner premium appearance.
Stitch and Seam Engineering Protects Strength and Fit
Select Stitch Length for the Material, Not for Appearance
- A visually dense seam can look “premium” while mechanically weakening a coated material. Each needle penetration creates a hole, and on PVC or vinyl those holes can act like a perforation line when they are too close together.
- Standard main seams: A common working range is approximately 3-4 mm per stitch for standard tire-cover seams, subject to the actual material and construction.
- Premium heavy-duty seams: Thicker or heavier constructions may use approximately 3.5-5 mm per stitch depending on material, needle, thread and load path. The larger spacing is not lower quality; it can preserve material between needle holes while still providing adequate seam integrity.
- Material response: Oxford fabrics, PVC, PU and marine vinyl all respond differently to needle penetration. The approved sewing setting should come from the actual production material, not from a generic sewing chart.
- Visual consistency: Operators and sewing QC also check whether the stitch line remains even around curves and does not suddenly become dense or loose because of difficult handling.
Control Seam Allowance to Control Finished Size
- A pattern can be perfectly cut and still produce the wrong finished diameter if the seam allowance varies during sewing. Circular products are especially sensitive because a small inward or outward shift continues around a long circumference.
- Released allowance: Seam allowance belongs to the pattern and work instruction. Operators should not change it to make two panels “fit” during sewing.
- Circular effect: Sewing several millimeters inside the intended line can reduce the visible face and increase tension around the sidewall. Sewing too close to the edge can weaken the seam or make the product oversized.
- Notch matching: Reference notches help distribute the circular seam and keep front and side panels aligned. When notches fail to meet, the issue should be investigated rather than forced together.
- QC link: Sewing QC checks seam allowance, alignment, puckering and the resulting finished geometry so dimensional drift is caught before final inspection.
Match Needle, Thread and Tension to the Construction
Needle and thread choice affect hole size, stitch formation, appearance and long-term seam behavior. Thread tension that is too high can pucker the seam or cut into softer materials; too low can create loose loops or inconsistent stitch formation.
Needle selection: The needle must penetrate the material cleanly without creating excessive damage. Thick, layered and coated constructions require an appropriate point and size for the selected thread.
Thread selection: Outdoor programs require thread compatible with the product’s strength and exposure expectations. Critical seams are not improved by heavy thread if the material around the needle holes becomes the weak point.
Tension balance: Upper and lower thread tension are adjusted so the seam locks correctly within the material layers. Uneven tension can distort the seam, especially on long curved sections.
Machine setup: First-piece approval verifies that the selected combination produces the intended seam on the actual bulk material before the sewing cell runs at volume.
Reinforce Stress Points Instead of Overbuilding Every Seam
A tire cover has specific areas where load concentrates: elastic joins, bungee exits, buckle attachments, webbing connections and camera reinforcement. Adding heavier stitching everywhere increases time and can damage materials without addressing the true failure point.
Load-path thinking: Reinforcement is added where pulling, vibration, installation or wind loads enter the structure. This may use an extra layer, bartack, pattern stitching, wider seam or another local construction.
Camera openings: Reinforcement around a camera opening must prevent tearing or deformation without pulling the opening out of position.
Closure points: Buckles, webbing and straps need enough attachment area to transfer load into the body material. The joint should be designed around the expected product use.
Verification: Critical attachment points can enter pull-force testing or additional inspection when required by the product specification.
Circular Construction Requires Controlled Panel Matching
Front-to-Side Matching
- Match notches before long curved sewing.
- Distribute fullness around the circumference.
- Keep seam allowance consistent.
- Check finished roundness after assembly.
Side Depth Control
- Control side-panel width during cutting.
- Prevent stretch during sewing.
- Match depth to the intended tire width.
- Compare first piece with the golden sample.
Back Closure Tension
- Elastic length controlled by specification.
- Bungee routing kept consistent.
- Joins and exits reinforced where required.
- Installation checked on the intended tire platform.
Wrinkle and Shape Control
Wrinkles can come from the pattern, cutting, feeding, seam allowance or closure tension. Final appearance therefore cannot be fixed only at ironing or packing. Szoneier evaluates the sewn shape during sample and first-piece review so the manufacturing cause is corrected at the right stage rather than hidden in final inspection.
- Inspect front-face flatness.
- Check sidewall distribution.
- Review seam puckering and tension.
- Confirm the cover remains removable without excessive force.
Binding Protects Edges, Openings and Premium Construction Details
Select Binding Around the Main Material
- Material compatibility: Binding that is much stiffer than the main panel can distort a curved edge. Binding that is too soft may wrinkle or roll during sewing. The selected tape needs the right balance for the opening or edge.
- Color and appearance: Premium automotive and branded products may require the binding to match or intentionally contrast with the main material. A color match is judged on the physical materials, not simply by using the same digital color value.
- Width: Binding width is selected so the raw edge remains enclosed after the tape is folded and stitched. Narrow coverage increases the risk of exposed edges; excessive width can make tight curves difficult to control.
- Exposure: Outdoor applications use binding materials that are appropriate for the intended environment rather than low-grade decorative tape that can fade, fray or bleed.
Control Curves, Joins and Corners
- Curve control: Tight radii require controlled feed and may need specific binding widths or construction adjustments. Pulling the tape around a curve can shrink the opening or cause the surrounding panel to pucker.
- Join control: Start and finish points are placed and overlapped so the join is secure without creating an obvious lump. Premium products need particular attention where the join remains visible.
- Stitch position: The seam needs to capture both sides of the binding consistently. A stitch that runs too close to one edge can miss the underside of the tape even when the top looks acceptable.
- QC: Binding QC checks twist, skipped sections, exposed raw edges, uneven visible width and damage around the opening or edge.
Use Binding as Part of Camera Reinforcement
- Reinforcement layer: An additional component can spread load around the opening and reduce tearing or deformation during installation.
- Opening geometry: The cut dimension and center come from the camera-specific pattern and jig. Binding must follow that geometry without pulling the opening smaller or shifting the center.
- Material balance: Thick reinforcement, the main panel and binding create multiple layers. Sewing settings must allow these layers to feed without bunching while still keeping the edge flat.
- Function check: The final criterion is not only a neat seam; the installed product must maintain camera clearance and stable opening geometry.
Inspect Binding as a Visible Manufacturing Signature
Binding is one of the easiest places for a procurement team to judge sewing discipline because defects are immediately visible in close-up photography. A clean, even edge shows control of material, feeding and stitch position.
- Acceptable appearance: Even width, smooth curves, captured raw edge, secure joins and consistent stitch position.
- Reject conditions: Twist, skip, exposed raw edge, major width variation, puckering, broken stitches or visible surface damage.
- Repeatability: First-piece approval establishes the visual reference for bulk. Inline inspection checks whether the binding quality is drifting as operator speed or material lots change.
- Brand value: On premium products, the quality of binding can influence the perceived value as much as the main material because customers handle and inspect these finished edges closely.
Camera Openings Require Pattern, Jig and Reinforcement Control
Define the Camera Geometry Before Cutting
- The project first confirms the verified vehicle, tire size, camera arrangement and relevant carrier details. Jeep Wrangler JL/JLU, Ford Bronco and other camera vehicles do not share one universal opening standard, so Szoneier links the camera construction to the correct pattern revision and jig.
- Pattern reference: The released pattern defines the opening center and surrounding reinforcement area relative to the tire-cover face.
- Artwork safe zone: The graphic layout is reviewed before production so critical text, logos or faces do not fall behind the camera or reinforcement.
- Jig reference: The manufacturing jig converts the engineering position into a repeatable physical location. Operators do not center the hole by visual judgment.
- Change control: A different tire size, carrier or camera generation can change the relationship between the cover and camera. The project is reviewed rather than assuming the previous opening remains valid.
Cut and Reinforce the Opening as One Construction Step
- The opening is marked, positioned with the approved jig, cut and then stabilized with the defined reinforcement. Treating these as one controlled sequence reduces the risk that a correct cut later deforms during sewing.
- Cut quality: The edge should be clean enough for the selected reinforcement and binding method. Excessive trimming after the fact can enlarge the opening beyond the approved dimension.
- Reinforcement: The material and geometry are selected to spread stress around the cutout. Reinforcement needs enough area to resist tearing without creating a stiff plate that distorts the front panel.
- Layer alignment: Main material, reinforcement and binding are aligned before sewing or other approved joining. Misalignment at this stage can move the effective opening even when the original cut was correct.
- Process ownership: Camera-hole operators, product engineering and QC share the critical references so manufacturing and inspection use the same pattern and jig information.
Sew or Bind Without Pulling the Opening Out of Position
The camera zone usually contains tighter curves and more layers than the surrounding front panel. Sewing therefore needs slower, controlled feeding and stable reference points.
Stitch placement: The seam needs to secure reinforcement and binding while avoiding unnecessary perforation close to the cut edge.
Tension: Excessive thread or binding tension can pull the opening smaller or oval. Uneven feeding can shift the center.
Pattern sewing: Where appropriate, programmable pattern sewing can reproduce a defined reinforcement geometry more consistently than freehand stitching.
Surface control: Printed and premium materials are protected from scratches or pressure marks during the additional handling required around the camera opening.
Verify the Finished Camera Function, Not Only the Hole Size
Szoneier performs 100% inspection on camera-hole products because a single incorrect opening can make an otherwise acceptable cover unusable. The check includes vehicle, tire size, pattern, jig, hole identity, center, reinforcement and artwork safe zone.
Engineering position: Camera center targets can use an engineering deviation of no more than approximately 2 mm where the project standard specifies it.
Opening dimension: Hole dimensions are controlled to the project requirement, commonly around ±2 mm for the defined opening where applicable.
Installed function: Final verification looks at whether the cover installs correctly without obstructing the camera. Fit, material tension and reinforcement should not push the camera out of position.
Visual result: Artwork, opening and circular cover face must still look balanced when installed. Functional accuracy and brand presentation are checked together.
Closures and Accessories Are Structural Components
Elastic Systems
- Controlled elastic length and specification.
- Secure joint construction.
- Balanced back-opening tension.
- Fit verified on the target tire platform.
Bungee Systems
- Cord and lock matched to the product.
- Exit points reinforced where required.
- Routing kept consistent across units.
- Pull and function checks available for critical programs.
Buckle and Strap Systems
- Approved buckle and webbing specification.
- Reinforced load path.
- Bartack or structural seam at stress points.
- Strap length and adjustment range controlled.
Zippers and Hook-and-Loop
- Opening length defined in the pattern.
- Reinforce zipper ends or stress transitions.
- Maintain flatness around the closure.
- Verify operation after the product is assembled.
Labels and Brand Components
- Controlled placement and orientation.
- Sew-on or other approved attachment.
- Avoid interference with critical seams.
- Repeat position across bulk production.
Critical Attachment Verification
Certain joins deserve more attention because failure affects function. Elastic joints, buckle attachments, webbing points, bungee exits and camera reinforcement can receive additional visual, dimensional or pull-force verification according to the product specification. The purpose is to validate the actual load path instead of increasing sewing density everywhere.
- Critical seam identification.
- Additional inline inspection.
- Pull-force testing where specified.
- Corrective action if the attachment drifts from the standard.
Transfer the Golden Sample Into Stable Bulk Production
Freeze the Production References Before Bulk Starts
- Material reference: The approved material ID, color, coating, fabric weight or thickness and relevant supplier information define what enters production.
- Pattern reference: Pattern ID and revision define cut geometry, seam allowance, notches, camera references and structural locations.
- Golden sample: The physical sample shows the approved workmanship, shape, binding, closure tension, fit and visual result.
- QC reference: Cutting, sewing, camera and final inspection use the same approved construction to determine whether the bulk product conforms.
Build the First Production Piece From Bulk Materials
- Cut verification: The first cut panels are checked for dimensions, printed registration and identity before sewing.
- Sewing setup: Needle, thread, stitch length, seam allowance, tension and machine setup are confirmed on the actual material.
- Assembly check: Elastic, bungee, buckles, binding, camera reinforcement or other components are installed using the released method.
- Comparison: The finished first piece is compared with the golden sample and project specification. If the construction does not match, production is corrected before a large quantity is completed.
Use Inline Control to Stop Process Drift Early
- Inspection frequency: Standard production includes workstation inspection at least every two hours, with increased frequency for critical new products or unstable processes.
- What is checked: Machine setting, stitch formation, size, material, workmanship and WIP mix-up. Cutting and printed registration issues can also be traced back if they appear during assembly.
- Stop-Correct-Recheck: A systemic problem triggers correction and re-verification before production continues. The goal is to stop repeated defects before hundreds of units require rework.
- Cell feedback: Sewing technicians and QC use the defect trend to adjust process control, not simply remove failed pieces from the line. This is how the approved product stays stable as quantity increases.
Return Repeat Orders to the Same Approved Construction
A repeat SKU should mean the same approved product unless the customer has authorized a revision. Szoneier reviews material lot, pattern revision, artwork, construction, accessories, golden sample and packaging before repeat production starts.
- Material continuity: If the supplier, coating or material grade changes, the effect on sewing, fit and previous test evidence is reviewed before substitution.
- Pattern continuity: The current released pattern is confirmed instead of relying on whichever file is easiest to find.
- Workmanship continuity: First-piece approval checks whether seam, binding, closure tension and appearance still match the established standard.
- Change management: Necessary changes are issued as controlled revisions so the brand can understand what changed and why. The objective is long-term supply consistency, not simply passing the first order.
Cutting and Sewing QC Uses Defined Control Points
The table below shows how Szoneier converts released patterns and workmanship standards into practical checks before cut panels and sewn products move to the next stage.
| Stage | Control Item | Typical Reference | Risk Prevented |
|---|---|---|---|
| Cutting | Pattern ID / revision | Released project pattern | Wrong version or construction |
| Cutting | Standard soft panel dimension | Typically ±3 mm | Fit and diameter drift |
| Cutting | Large RV panel dimension | Typically ±5 mm | Set and size inconsistency |
| Printed cutting | Graphic registration | Approved artwork / cut reference | Off-center visual after sewing |
| Sewing | Stitch length | About 3–4 mm standard; material-specific | Weak seam or perforation |
| Heavy-duty sewing | Stitch length | About 3.5–5 mm where appropriate | Excessive needle-hole concentration |
| Sewing | Seam allowance | Released pattern / first piece | Finished size drift |
| Sewing | Stitch formation | No skip, break, loose thread or severe puckering | Structural and appearance defects |
| Binding | Width / twist / raw edge | Golden sample / project standard | Exposed or unstable edge |
| Critical seam | Elastic / buckle / reinforcement | Approved construction | Retention or load-point failure |
| Camera | Center / opening / reinforcement | Camera-specific project standard | Camera obstruction or misfit |
| Inline QC | Workstation process | At least every 2 hours standard | Repeated bulk process drift |
Cut and Sew Capacity Changes With Product Complexity
Flexible Production Supports Samples and Short Runs
- Sample route: Approved material or development material is cut in low layers, sewn by technicians familiar with pattern changes and checked for fit, structure and appearance.
- Short-run route: Multiple sizes or artwork versions can move through controlled files without forcing them into a long repeated production sequence.
- Engineering advantage: Problems found during sample sewing can be returned to the pattern or construction before the bulk line is set up, reducing later rework.
- Commercial use: This route is suitable for new product development, new vehicle fitment, camera projects, private-label sampling and pilot orders.
Bulk Cutting Creates a Stable Feed for Sewing Cells
- Bulk material: Repeated materials can move through controlled lay preparation and multi-ply cutting where thickness, coating and stack behavior allow it.
- Panel batching: Fronts, side panels, backs, reinforcement and accessory pieces are grouped and identified so the sewing cell receives complete sets.
- Printed work: Registration-critical printed panels use a more controlled route and may not run at the same speed as plain repeated panels.
- Capacity principle: Cutting is often not the primary bottleneck on a standard tire-cover order; sewing complexity, special structures and inspection requirements commonly determine the finished output.
Sewing Output Depends on Material and Construction
- Simple polyester construction: Standard spare covers with an elastic back, simple printed front and no camera opening may run around 3,500-5,000 pieces per day under suitable continuous conditions.
- Marine vinyl: Thicker material, slower handling, tighter visual standards, double-needle details or binding can reduce normal output to approximately 1,800-3,000 pieces per day.
- Camera covers: Camera holes, reinforcement, binding, pattern sewing and position inspection add operations, so normal output can be approximately 1,200-2,500 pieces per day depending on the verified construction.
- Complex custom products: Multiple panels, zippers, straps, special reinforcement, pockets or non-standard closures may reduce daily output to approximately 500-1,500 pieces. These figures explain why capacity should be planned against the approved design rather than quoted as one universal number.
Large OEM Orders Use Dedicated and Repeatable Production Routes
Higher-volume orders move from flexible manufacturing into more dedicated material booking, spreading, cutting, sewing and inspection routines. The objective is not only to increase speed but to reduce switching and preserve the approved construction.
- Dedicated SKU flow: Mature patterns and stable materials allow panel cutting and sewing tasks to be balanced across a repeatable cell.
- First-piece gate: A production line is released only after the bulk-material first piece matches the approved standard.
- Inline control: Inspection continues during production, so increasing volume does not mean postponing quality decisions until final inspection.
- Rolling production: Very large orders can be planned in staged production and partial shipment where commercially appropriate, allowing the customer to align inventory and delivery schedules with manufacturing output.
- Planning principle: Production capacity is confirmed per order using material, number of SKUs, construction complexity, inspection level and requested delivery schedule rather than treating the highest theoretical speed as a guaranteed promise.
Frequently Asked Questions

Start Your Tire Cover Cut and Sew Project
- Product type and tire size
- Vehicle and camera details, if applicable
- Tech pack or pattern, if available
- Reference sample or product photos
- Material and thickness/GSM, if known
- Closure and reinforcement requirements
- Artwork and branding method
- Order quantity and sample quantity
- Target launch or delivery date
- Existing QC or golden-sample standard

